How to Paint a Brick Fireplace: A Complete Guide
Transforming the look and feel of your living space can be as simple as giving your brick fireplace a fresh coat of paint. A painted fireplace can become the focal point of a room, adding modern flair and brightening up the space.
CAPO Building Specialties, your trusted source for top-quality fireplaces, is here to guide you through each step of this DIY project.
Before You Begin: Preparation Is Key

Before diving into painting, it’s crucial to ensure your fireplace is clean and ready for a makeover. Start by laying down drop cloths or old sheets to protect your flooring and furniture. Wearing protective gear, such as gloves and safety glasses, is also recommended throughout the process.

Tools and Materials You’ll Need:
- Trisodium phosphate (TSP) or a similar cleaner
- Stiff-bristled brush
- Painter’s tape
- Drop cloths or old sheets
- High-quality primer (high heat-resistant if available)
- Latex or acrylic paint in your chosen color
- Paintbrushes and rollers
- Optional: paint sprayer for a smoother finish
Step 1: Clean the Brick Surface
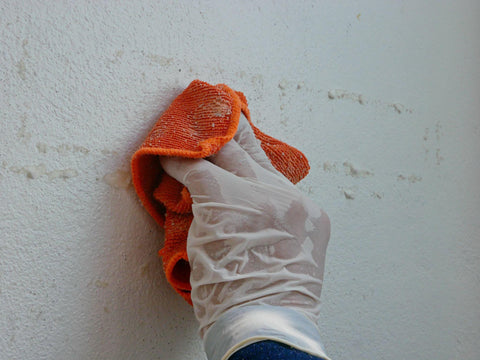
The first step in painting your brick fireplace involves thoroughly cleaning the brick surface to ensure the paint adheres properly and the finish looks smooth and even. Begin by mixing a cleaning solution of TSP (trisodium phosphate) and water, adhering to the manufacturer’s instructions for the correct proportions.
Once the solution is ready, use a stiff-bristled brush to scrub the brick surface vigorously. This step is crucial for removing any accumulated soot, dirt, and grime, which are common on fireplace bricks. After scrubbing, rinse the surface with clean water to wash away any residue of the cleaning solution and loosened debris.
Finally, it’s essential to allow the brick to dry completely before moving on to the next step. A drying time of at least 24 hours is recommended to ensure that the brick is fully dry and ready for priming and painting.
Step 2: Tape and Protect Surrounding Areas
Moving on to the second step, it’s important to protect the surrounding areas before beginning the painting process. This involves applying painter’s tape with care around the edges of the fireplace. The goal is to shield the walls and flooring from any accidental paint splatters or drips, ensuring a clean and professional finish.
After securing the edges with tape, cover the immediate vicinity of the fireplace with drop cloths or old newspapers. This extra layer of protection will catch any paint that escapes the brush or roller, keeping your workspace neat and minimizing cleanup.
By taking these precautions, you’ll be able to focus more on achieving a beautiful finish on your fireplace, without worrying about causing unintended messes in the rest of the room.
Step 3: Apply Primer
The third step in the process of painting your brick fireplace is the application of primer, which is essential for ensuring that the paint adheres well and provides a durable finish. Start by selecting a high-quality primer that is specifically designed for use on brick surfaces. If your fireplace is still in use, it’s important to choose a primer that is heat-resistant to withstand the temperatures it will be exposed to.
Once you have the right primer, proceed to apply a thin, even coat across the surface of the bricks. For the edges and harder-to-reach areas, use a paintbrush for precision. A roller is more suitable for covering the larger, more accessible areas of the fireplace. This method ensures a uniform application without leaving any spots uncovered.
After applying the coat of primer, it’s crucial to allow it sufficient time to dry completely before moving on to painting. The drying time can vary, but it is usually recommended to wait at least 24 hours, as specified by the primer’s manufacturer.
This patience ensures that the primer sets properly, creating an ideal surface for the paint to adhere to.
Step 4: Paint the Brick Fireplace
For the fourth step in transforming your brick fireplace, it’s time to bring color into the equation. Begin by selecting a latex or acrylic paint in the color that best fits your vision for the space. When it comes to fireplaces, finishes like satin or semi-gloss are often preferred due to their ease of cleaning, which is a practical consideration for a feature that may accumulate soot or dust over time.
With your chosen paint at the ready, proceed to apply the first coat, employing the same careful technique used for the primer. This involves using a paintbrush for the finer edges and a roller for the broad surfaces, ensuring consistent coverage across the entire fireplace. Once the first layer is applied, allow it to dry completely. This is crucial for assessing the need for additional coats.
Depending on the initial coverage and the intensity of the color you’re aiming for, a second coat of paint may be necessary. If so, apply it once the first coat is fully dry to achieve that even, rich color and coverage that will make your fireplace a standout feature in the room.
Step 5: Clean Up and Enjoy
Concluding your fireplace painting project involves a few final steps to clean up and then enjoy the fruits of your labor. Begin by carefully removing the painter’s tape from around the fireplace. This step reveals the crisp, clean lines of your painting efforts, giving the space a professional-looking finish.
Next, it’s time to clean your brushes and rollers. Proper cleaning ensures that your tools are preserved for future projects and prevents the paint from hardening on the bristles or rollers. Once the cleanup is complete and everything is dry, take a moment to step back and admire your work.
The refreshed fireplace, now boasting a new coat of paint, should stand as a testament to your effort and attention to detail, transforming the look of your room and serving as a cozy centerpiece to gather around.
Tips for a Successful Fireplace Painting Project

For a successful fireplace painting project, there are several key tips to keep in mind. First and foremost, ensure the room is well-ventilated throughout the project to avoid inhaling any harmful fumes. This can be achieved by opening windows and using fans to circulate air.
Next, the quality of the materials you choose plays a significant role in the outcome of your project. Investing in high-quality paint and primers is crucial for achieving the best finish and ensuring the durability of your fireplace’s new look.
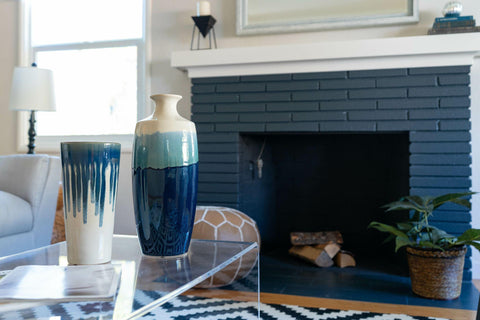
Last, when selecting your paint color, take into consideration the room’s overall color scheme and lighting. Lighter colors can help make a room feel larger and more open, bringing in a sense of brightness and airiness. On the other hand, opting for darker colors can create a cozy and intimate vibe, perfect for spaces where you want to foster a sense of warmth and comfort.
Keeping these tips in mind will help you achieve a beautifully painted fireplace that enhances the overall appeal of your living space.
Upgrade Your Brick Fireplace with CAPO Building Specialties

At CAPO Building Specialties, we believe that every detail in your home should reflect your style and personality, including your fireplace. Painting your brick fireplace can breathe new life into your space, and we’re here to help you make it happen.
Look through our website for more inspiration and tips on enhancing your home with our range of fireplaces and accessories.
- 4th of July mantel decor
- 4th of July mantel decorations
- 4th of July mantel ideas
- Advantages electric fireplace
- Are outdoor fire pits safe
- Backyard design
- Backyard fireplace ideas
- Backyard furniture
- Backyard Landscaping
- Backyard oasis
- Barbecue corn
- Barbecue tri-tip
- Barbecued chicken
- BBQs
- Best electric fireplace
- Best outdoor grills
- Best Wood to Burn in a Stove
- Brick fireplace cleaning
- Brick fireplaces
- Built-in electric fireplaces
- Burger recipes
- Burning pine wood
- Can you burn pine wood
- Can you burn pine wood in a fire pit
- Can you roast marshmallows on a gas fire pit?
- Christmas decorations
- Christmas fireplace
- Christmas Fireplace Decor
- Christmas mantel decor
- Cinco de Mayo mantel decor
- Cleaning a fireplace
- Cleaning your grill grates
- Cooking a steak
- Cost of an outdoor fireplace
- Custom mantels for stockings
- Decorate fireplace mantel
- Decorate mantel for Valentine’s Day
- Decorating a fireplace
- Decorating a mantel for St. Patrick’s Day
- DIMPLEX fireplaces
- Easter mantel decor
- Easter mantel decor ideas
- Easter mantel decorations
- Eco-friendly Fireplaces
- Efficient fireplaces
- Electric fireplace
- Electric fireplace consoles
- Electric fireplace energy efficiency
- Electric fireplace flames
- Electric fireplace insert
- Electric fireplace inserts
- Electric fireplace models
- Electric fireplace use
- Electric fireplaces
- Electric fireplaces and venting
- Electric heaters
- Electric insert installation
- Energy consumption of electric fireplaces
- Energy efficiency
- Fireplace cleaning advice
- Fireplace cleaning tips
- Fireplace decoration
- Fireplace glass doors
- Fireplace insert installation
- Fireplace insert measurements
- Fireplace inserts
- Fireplace mantel
- Fireplace mantel decor
- Fireplace mantel ideas
- Fireplace mantels
- Fireplace models
- Fireplace wood
- Flame displays
- Freestanding stove
- Gas fire pit
- Gas fire pits
- Gas fireplaces and electricity
- Grill cleaning tips
- Grill grilled cheese
- Grill steak outdoors
- Grilled asparagus
- Grilled bbq chicken
- Grilled cheese
- Grilled corn
- Grilled New York Strip Steak
- Halloween Decor
- Hanging Christmas stockings
- Holiday Home Styling
- Holiday mantel decor
- Homemade pizza
- How do I barbecue chicken
- How do I start a fire in a fire pit
- How do you barbecue a tri-tip
- How do you barbecue shrimp
- How do you make grilled cheese on the stove
- How does a smokeless fire pit work
- How gas fireplaces work
- How much does an outdoor fireplace cost
- How to barbecue a New York Strip Steak
- How to barbecue oysters
- How to barbecue shrimp
- How to build a fire in a fireplace
- How to clean grill grates
- How to clean the barbecue grill grate
- How to cook a grilled cheese sandwich on the stove
- How to cook oysters on the grill
- How to cook rice
- How to decorate a mantel for Valentine’s Day
- How to decorate for Cinco de Mayo
- How to efficiently use a wood stove
- How to grill oysters
- How to grill salmon
- How to hang stockings
- How to keep a wood stove burning all night
- How to keep a wood-burning stove
- How to light a gas fire pit
- How to make barbecue shrimp
- How to make grilled cheese on the stove
- How to mount tv on brick fireplace
- How to paint a brick fireplace
- How to paint a fireplace
- How to start a fire in a fireplace
- How to start a fire in fire pit
- How to use a wood stove efficiently
- How to use a wood-burning stove
- How to use a wood-burning stove efficiently
- Indoor stove
- Installing a fireplace insert
- Landscape design
- Leading fireplace distributor
- Lighting a gas fire pit
- Mantel decor
- Mantel decor for Hanukkah
- Mantel decor ideas
- Mantel-less Fireplace Ideas
- Medium-rare steak
- Mounting a tv on brick
- New fireplace mantel
- New Year mantel decor
- New Year mantel decor ideas
- New Years fireplace mantel decor
- Outdoor barbecue grill
- Outdoor fire pit safety
- Outdoor fire pit safety tips
- Outdoor fireplace
- Outdoor fireplace cost
- Outdoor fireplace design
- Outdoor fireplace ideas
- Outdoor fireplace mantel
- Outdoor grill
- Outdoor grill cleaning
- Outdoor grills
- Outdoor living area
- Outdoor Living Areas
- Outdoor living space
- Outdoor Living Space Ideas
- Outdoor oasis
- Outdoor pizza oven
- Outdoor pizza oven recipes
- Outdoor space
- Pan-seared salmon
- Pizza oven cooking tips
- Popcorn seasoning
- Professional steak grilling tips
- Quality outdoor grills
- Realistic electric fireplaces
- Realistic flame displays
- Realistic Flame Effects
- Reheating rice
- Rice cooking techniques
- Roasting marshmallows on a gas fire pit
- Safe electric fireplaces
- Salmon grilling tips
- Smokeless fire pits
- Sparky's Corner
- St. Patrick’s Day mantel decor
- St. Patrick’s Day mantel decorations
- Steak recipe
- Steaks on the grill
- Stove burning all night
- Stovetop burger
- Stovetop popcorn
- Stovetop salmon
- Thanksgiving mantel decor
- Top-quality fireplaces
- Turkey decorations
- TV on brick fireplace
- Types of fireplace inserts
- Types of fireplace mantels
- Types of fireplaces
- Types of firewood
- Upgrading your brick fireplace
- Valentine’s Day mantel decor
- Venting an electric fireplace
- What is a fireplace insert
- What is a fireplace mantel
- What is tri-tip?
- Wood burning fire pit
- Wood burning fireplace
- Wood for burning
- Wood stove
- Wood stove buyers guide
- Wood stove regulations
- Wood stove safety tips
- Wood stoves
- Wood-burning fireplace
- Wood-burning stove safety
- Wood-burning stove safety check
- Wood-burning stoves
- Wood-fired pizza oven


